ExtendedShader
自 2.0.0在阅读本页前,请确保你已了解 Minecraft Core Shader。
Photon2 和 LDLib2 使用 ExtendedShader 扩展了原版着色器,添加了:
- 几何着色器 (
attach) 支持 - 额外的采样器和 uniform 变量
📦 如何使用
ExtendedShader JSON 与原版几乎相同。
这里展示一个使用 Texture Material 的示例。
json
{
    "vertex": "photon:particle",
    /*
        "geometry": "<namespace>:<name>.gsh" // (1)
    */
    "fragment": "photon:hdr_particle",
    "samplers": [
        { "name": "Sampler2" },
        // 自定义采样器
        { "name": "Texture" }
    ],
    "uniforms": [
        { "name": "ModelViewMat", "type": "matrix4x4", "count": 16, "values": [1,0,0,0,0,1,0,0,0,0,1,0,0,0,0,1] },
        { "name": "ProjMat", "type": "matrix4x4", "count": 16, "values": [1,0,0,0,0,1,0,0,0,0,1,0,0,0,0,1] },
        { "name": "ColorModulator", "type": "float", "count": 4, "values": [1,1,1,1] },
        { "name": "FogStart", "type": "float", "count": 1, "values": [0.0] },
        { "name": "FogEnd", "type": "float", "count": 1, "values": [1.0] },
        { "name": "FogColor", "type": "float", "count": 4, "values": [0,0,0,0] },
        { "name": "FogShape", "type": "int", "count": 1, "values": [0] },
        // 自定义 uniform 变量
        { "name": "DiscardThreshold", "type": "float", "count": 1, "values": [0.01] },
        { "name": "HDR", "type": "float", "count": 4, "values": [0,0,0,1] },
        { "name": "HDRMode", "type": "int", "count": 1, "values": [0] }
    ]
}- 如有需要可附加几何着色器。
与原版粒子着色器的区别:
- 在
particle.vsh标签页中,使用#moj_import <photon:particle.glsl>和getParticleData()获取顶点数据。 - 在
hdr_particle.fsh标签页中,添加了 HDR 颜色输出。
🎯 处理顶点数据
不同的 FX 对象和渲染器设置(如 GPU Instance、Additional GPU Data)可以改变顶点类型和布局。
Photon2 提供了一个辅助库,通过宏自动解析并转换输入顶点数据为可访问的格式。
更多信息:顶点格式
glsl
// 需要 GLSL 版本 330+
#version 330 core

/*
struct ParticleData {
    vec3 Position;
    vec4 Color;
    vec2 UV;
    ivec2 LightUV;
    vec3 Normal;
};

ParticleData getParticleData() {
    // (1)
}
*/

void main() {
    ParticleData data = getParticleData();
    vec3 position = data.Position;
    vec4 color = data.Color;
    vec2 uv = data.UV;
    ivec2 lightUV = data.LightUV;
    vec3 normal = data.Normal;
}- 内部实现,详见顶点格式。
实现细节
在顶点着色器中:
- 确保
#version为 330 或更高。 - 导入 Photon2 顶点库:
#moj_import <photon:particle.glsl> - 通过
getParticleData()访问数据——无需手动处理内部布局。 - Photon2 支持传递额外的 GPU 顶点数据(例如粒子生命周期、速度)。 参见:Additional GPU Data
🎨 扩展采样器
Photon2 提供了超出原版的额外内置采样器。
当在 JSON 中声明这些采样器时,它们不会显示在 Inspector 中。
| 采样器名称 | 描述 | 预览 |
|---|---|---|
Sampler2 | 光照贴图 | 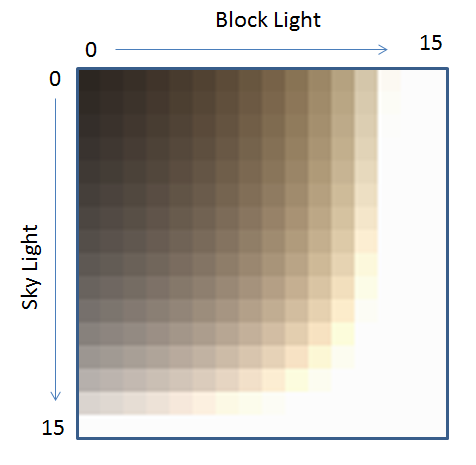 |
SamplerSceneColor | 世界颜色 | 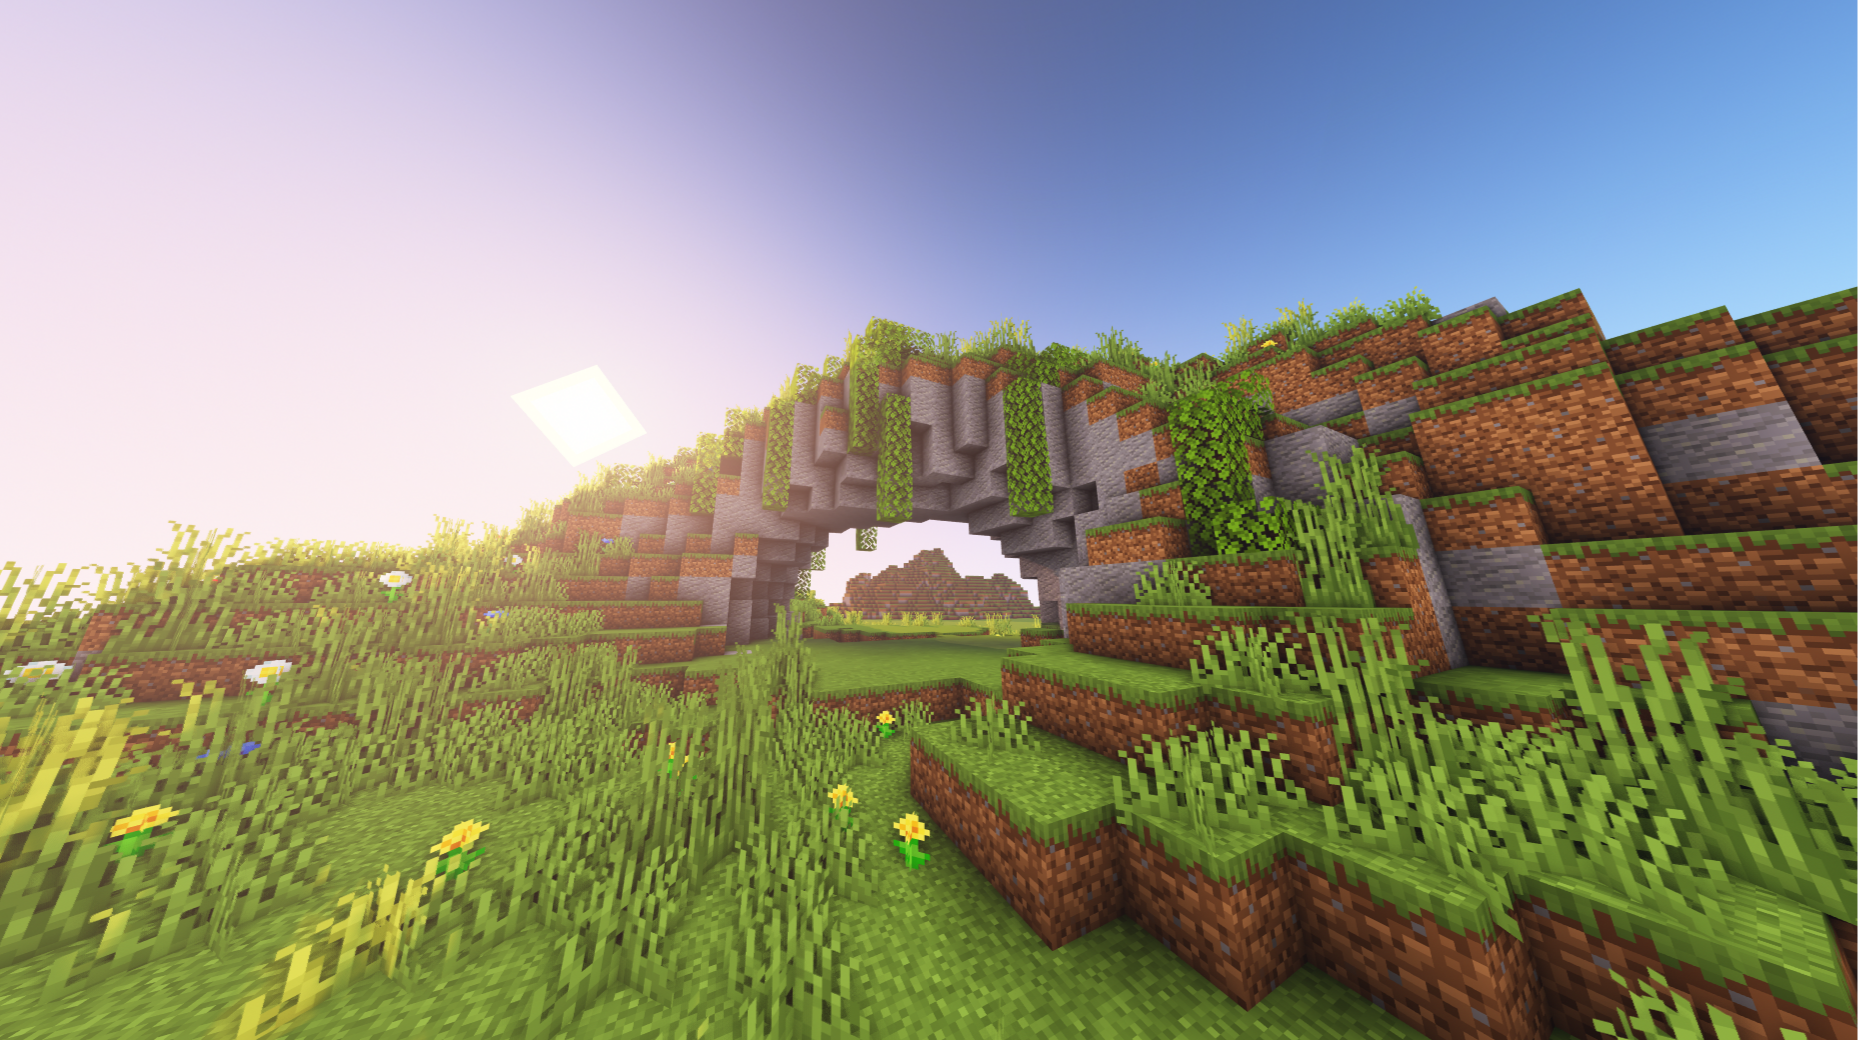 |
SamplerSceneDepth | 世界深度 | 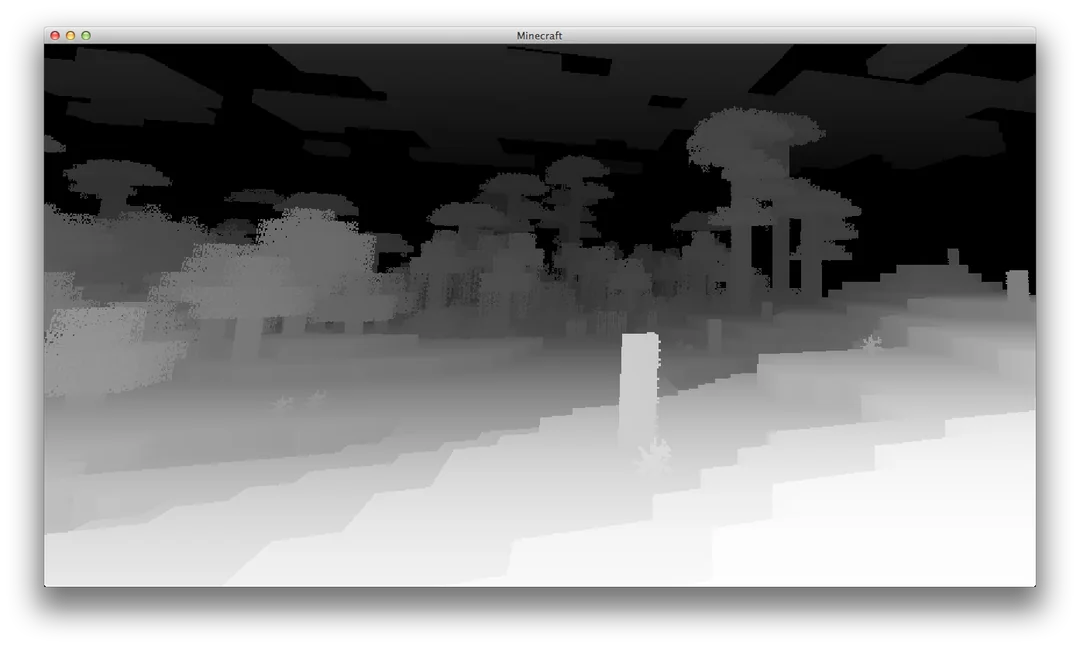 |
SamplerCurve | 曲线采样器 | - |
SamplerGradient | 渐变采样器 | - |
📈 SamplerCurve / SamplerGradient

特殊采样器,仅在分配了曲线或渐变时生效。
Photon2 将它们编码为 128×128 纹理,以便在着色器中采样。
glsl
#moj_import <photon:particle_utils.glsl>
/* 内部实现
const float INV_TEX_SIZE = 1.0 / 128.0;
const float MAX_U = 1.0 - 0.5 * INV_TEX_SIZE;

float getCurveValue(sampler2D curveTexture, int curveIndex, float x) {
    return texture(curveTexture, vec2(clamp(x, 0.0, MAX_U), (float(curveIndex) + 0.5) * INV_TEX_SIZE)).r;
}

vec4 getGradientValue(sampler2D gradientTexture, int gradientIndex, float x) {
    return texture(gradientTexture, vec2(clamp(x, 0.0, MAX_U), (float(gradientIndex) + 0.5) * INV_TEX_SIZE));
}
*/

uniform sampler2D SamplerCurve;
uniform sampler2D SamplerGradient;

void main() {
    float value = getCurveValue(SamplerCurve, 0, x);
    vec4 color = getGradientValue(SamplerGradient, 0, x);
}
使用方法:
导入辅助库:
glsl#moj_import <photon:particle_utils.glsl>调用
getCurveValue()和getGradientValue()获取值。
🛠 扩展 Uniforms
Photon2 在原版核心着色器的基础上添加了更多内置 uniform 变量。
📋 原版内置 Uniforms
| 名称 | 类型 | 描述 |
|---|---|---|
ModelViewMat | mat4 | 模型视图矩阵 |
ProjMat | mat4 | 正交投影矩阵(宽=窗口,高=窗口,近=0.1,远=1000) |
ScreenSize | vec2 | 帧缓冲区宽度和高度(像素) |
ColorModulator | vec4 | 最终颜色乘数 |
FogColor | vec4 | 雾颜色与密度(alpha = 密度) |
FogStart | float | 雾起始距离 |
FogEnd | float | 雾结束距离 |
FogShape | int | 雾模式 |
GameTime | float | 标准化游戏时间(0–1,每 20 分钟循环一次) |
GlintAlpha | float | 闪光强度(0–1) |
📋 Photon2 内置 Uniforms
| 名称 | 类型 | 描述 |
|---|---|---|
U_CameraPosition | vec3 | 摄像机世界坐标 |
U_InverseProjectionMatrix | mat4 | 预计算的 ProjMat 逆矩阵 |
U_InverseViewMatrix | mat4 | 预计算的 ModelViewMat 逆矩阵 |
U_ViewPort | vec4 | 视口(x, y, w, h) 自 2.1.3.a 起 |