Getting Start
This page builds the smallest useful editor: an editor window, one project type, one project, and default resources.
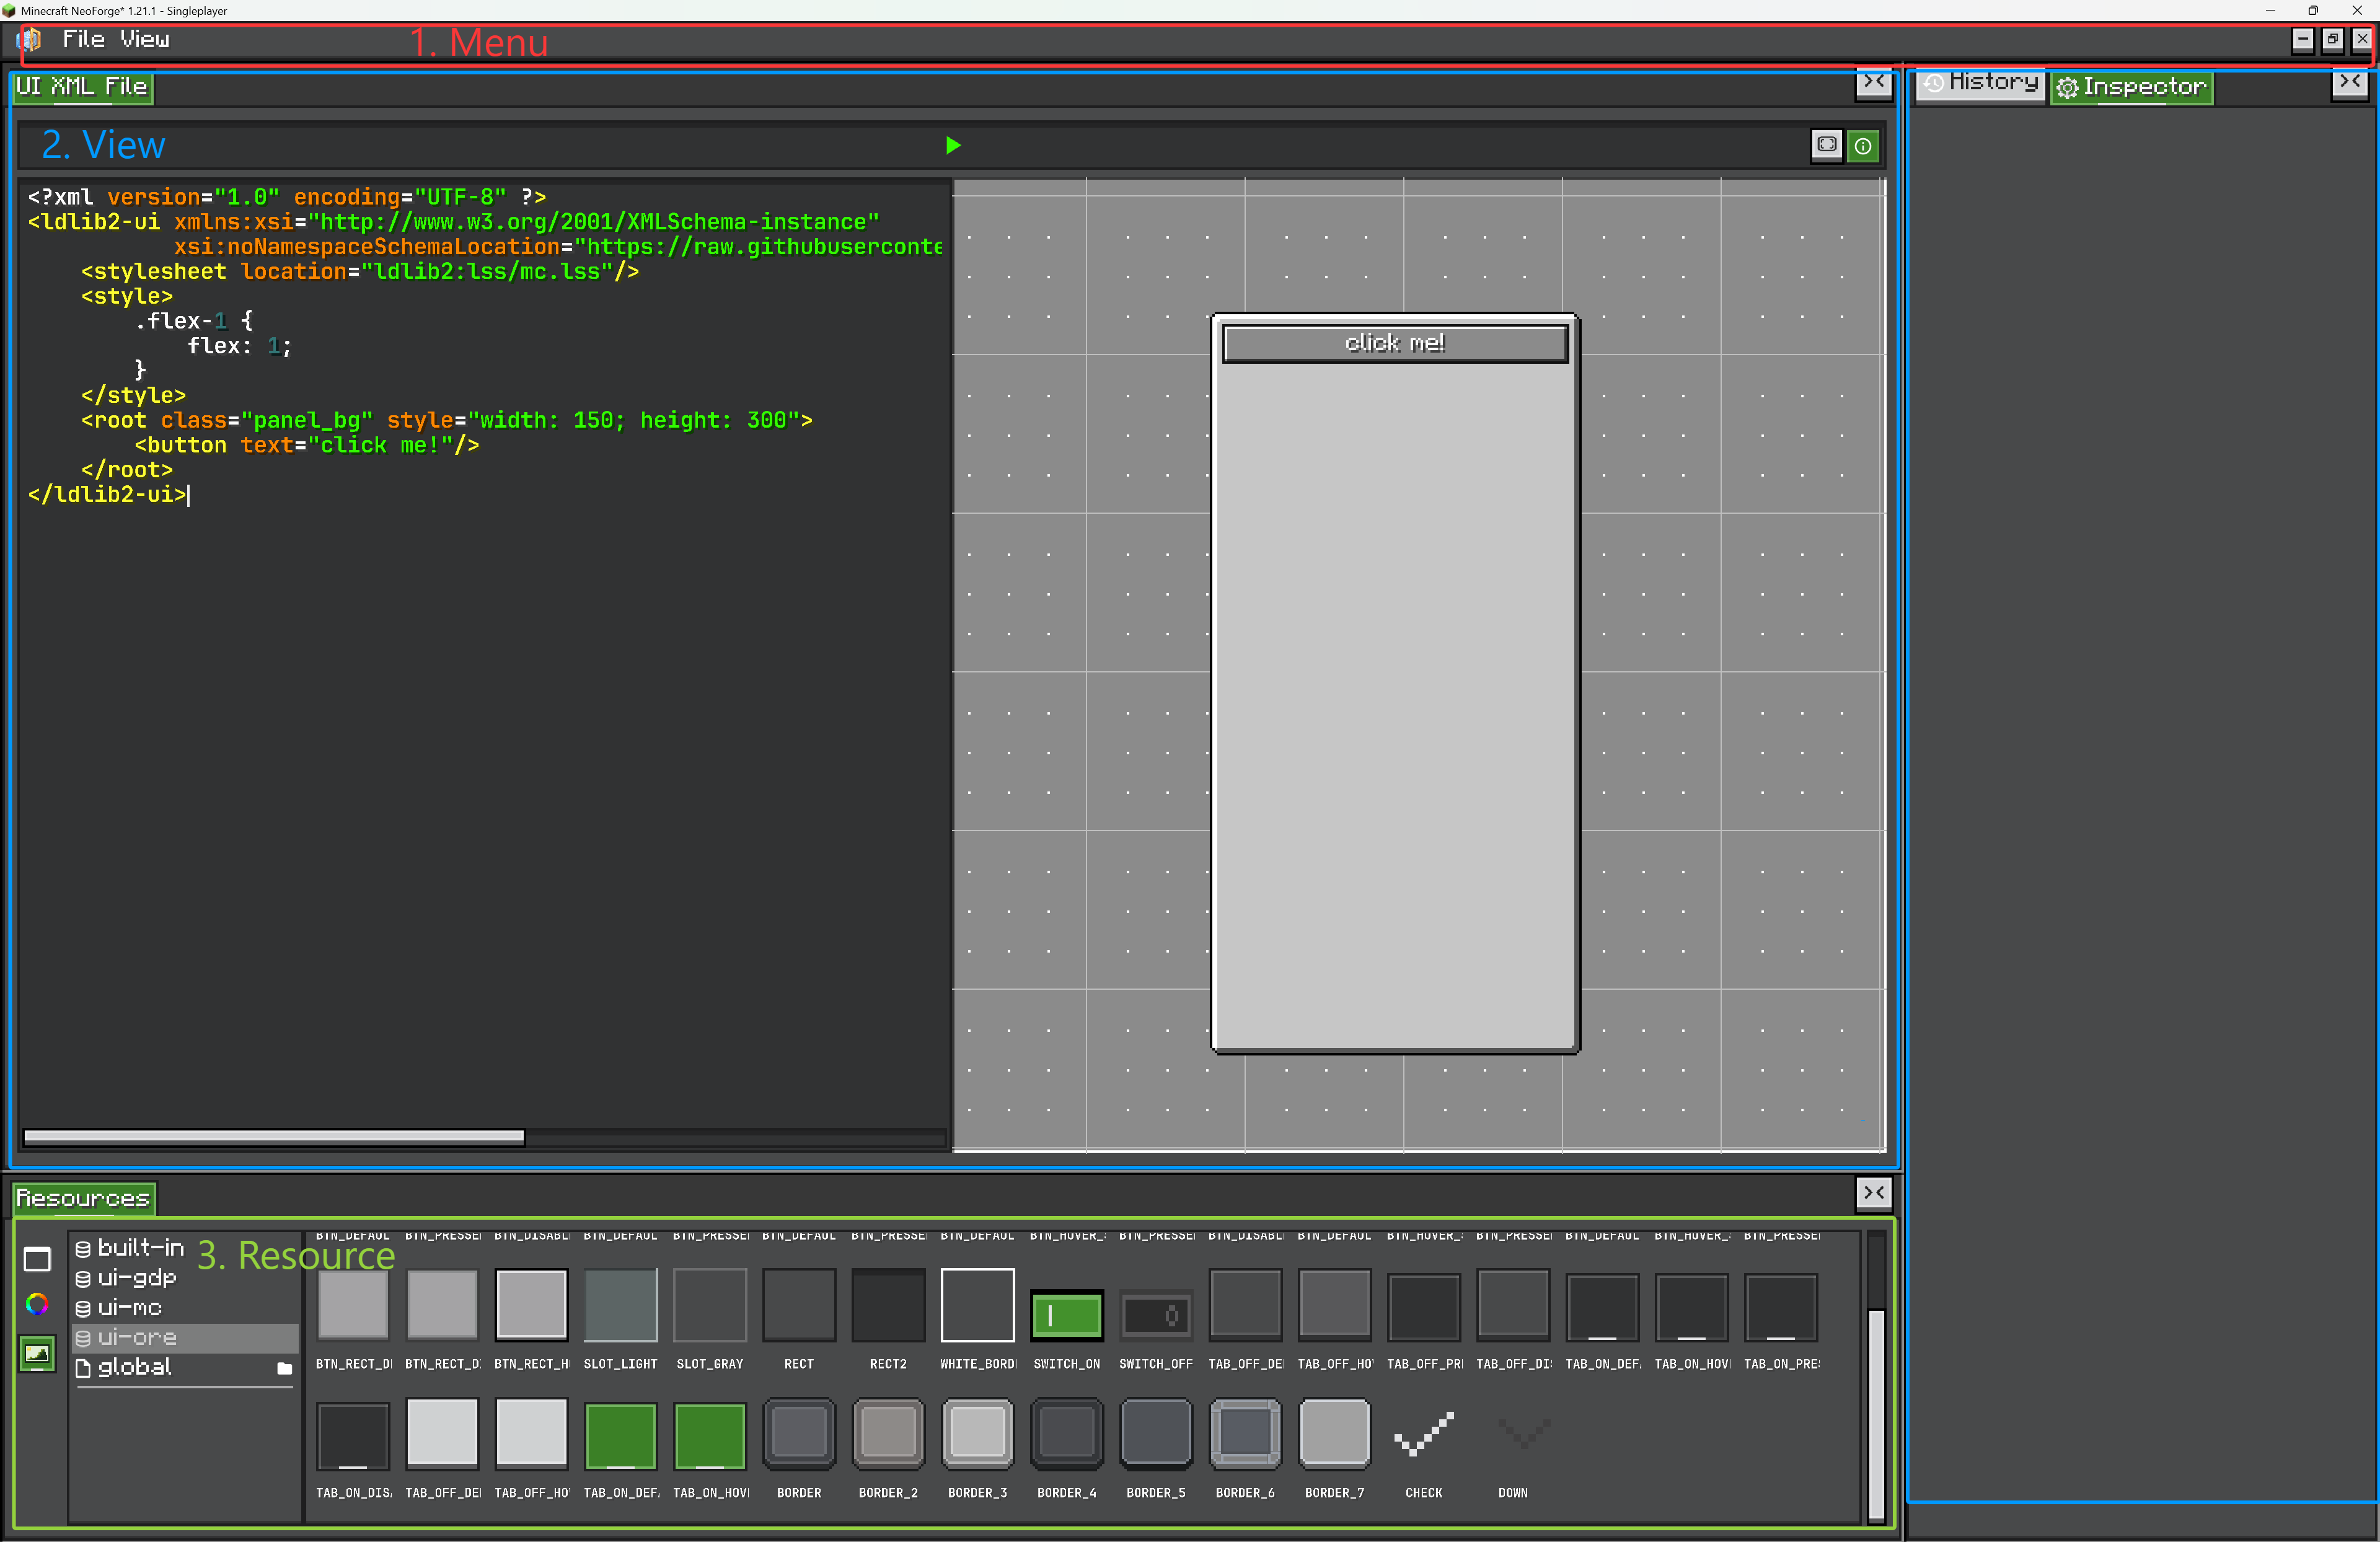
Understand the Editor UI
An editor screen is usually made of three visible parts:
-
Menu
The top bar holds editor commands.FileMenuhandles project actions such as New, Open, Save, Save As, Settings, and Exit. Custom editors can add more menu entries or new menu tabs. -
View area
The main workspace is made of dockable views. A view can be a canvas, tree, code editor, graph editor, preview, inspector-like panel, or any custom UI. Views can be arranged inside split panels. -
Resource area
The resource panel shows reusable assets exposed by the current project. Resources are grouped by resource type and loaded through providers such as built-in resources, file folders, or packs.
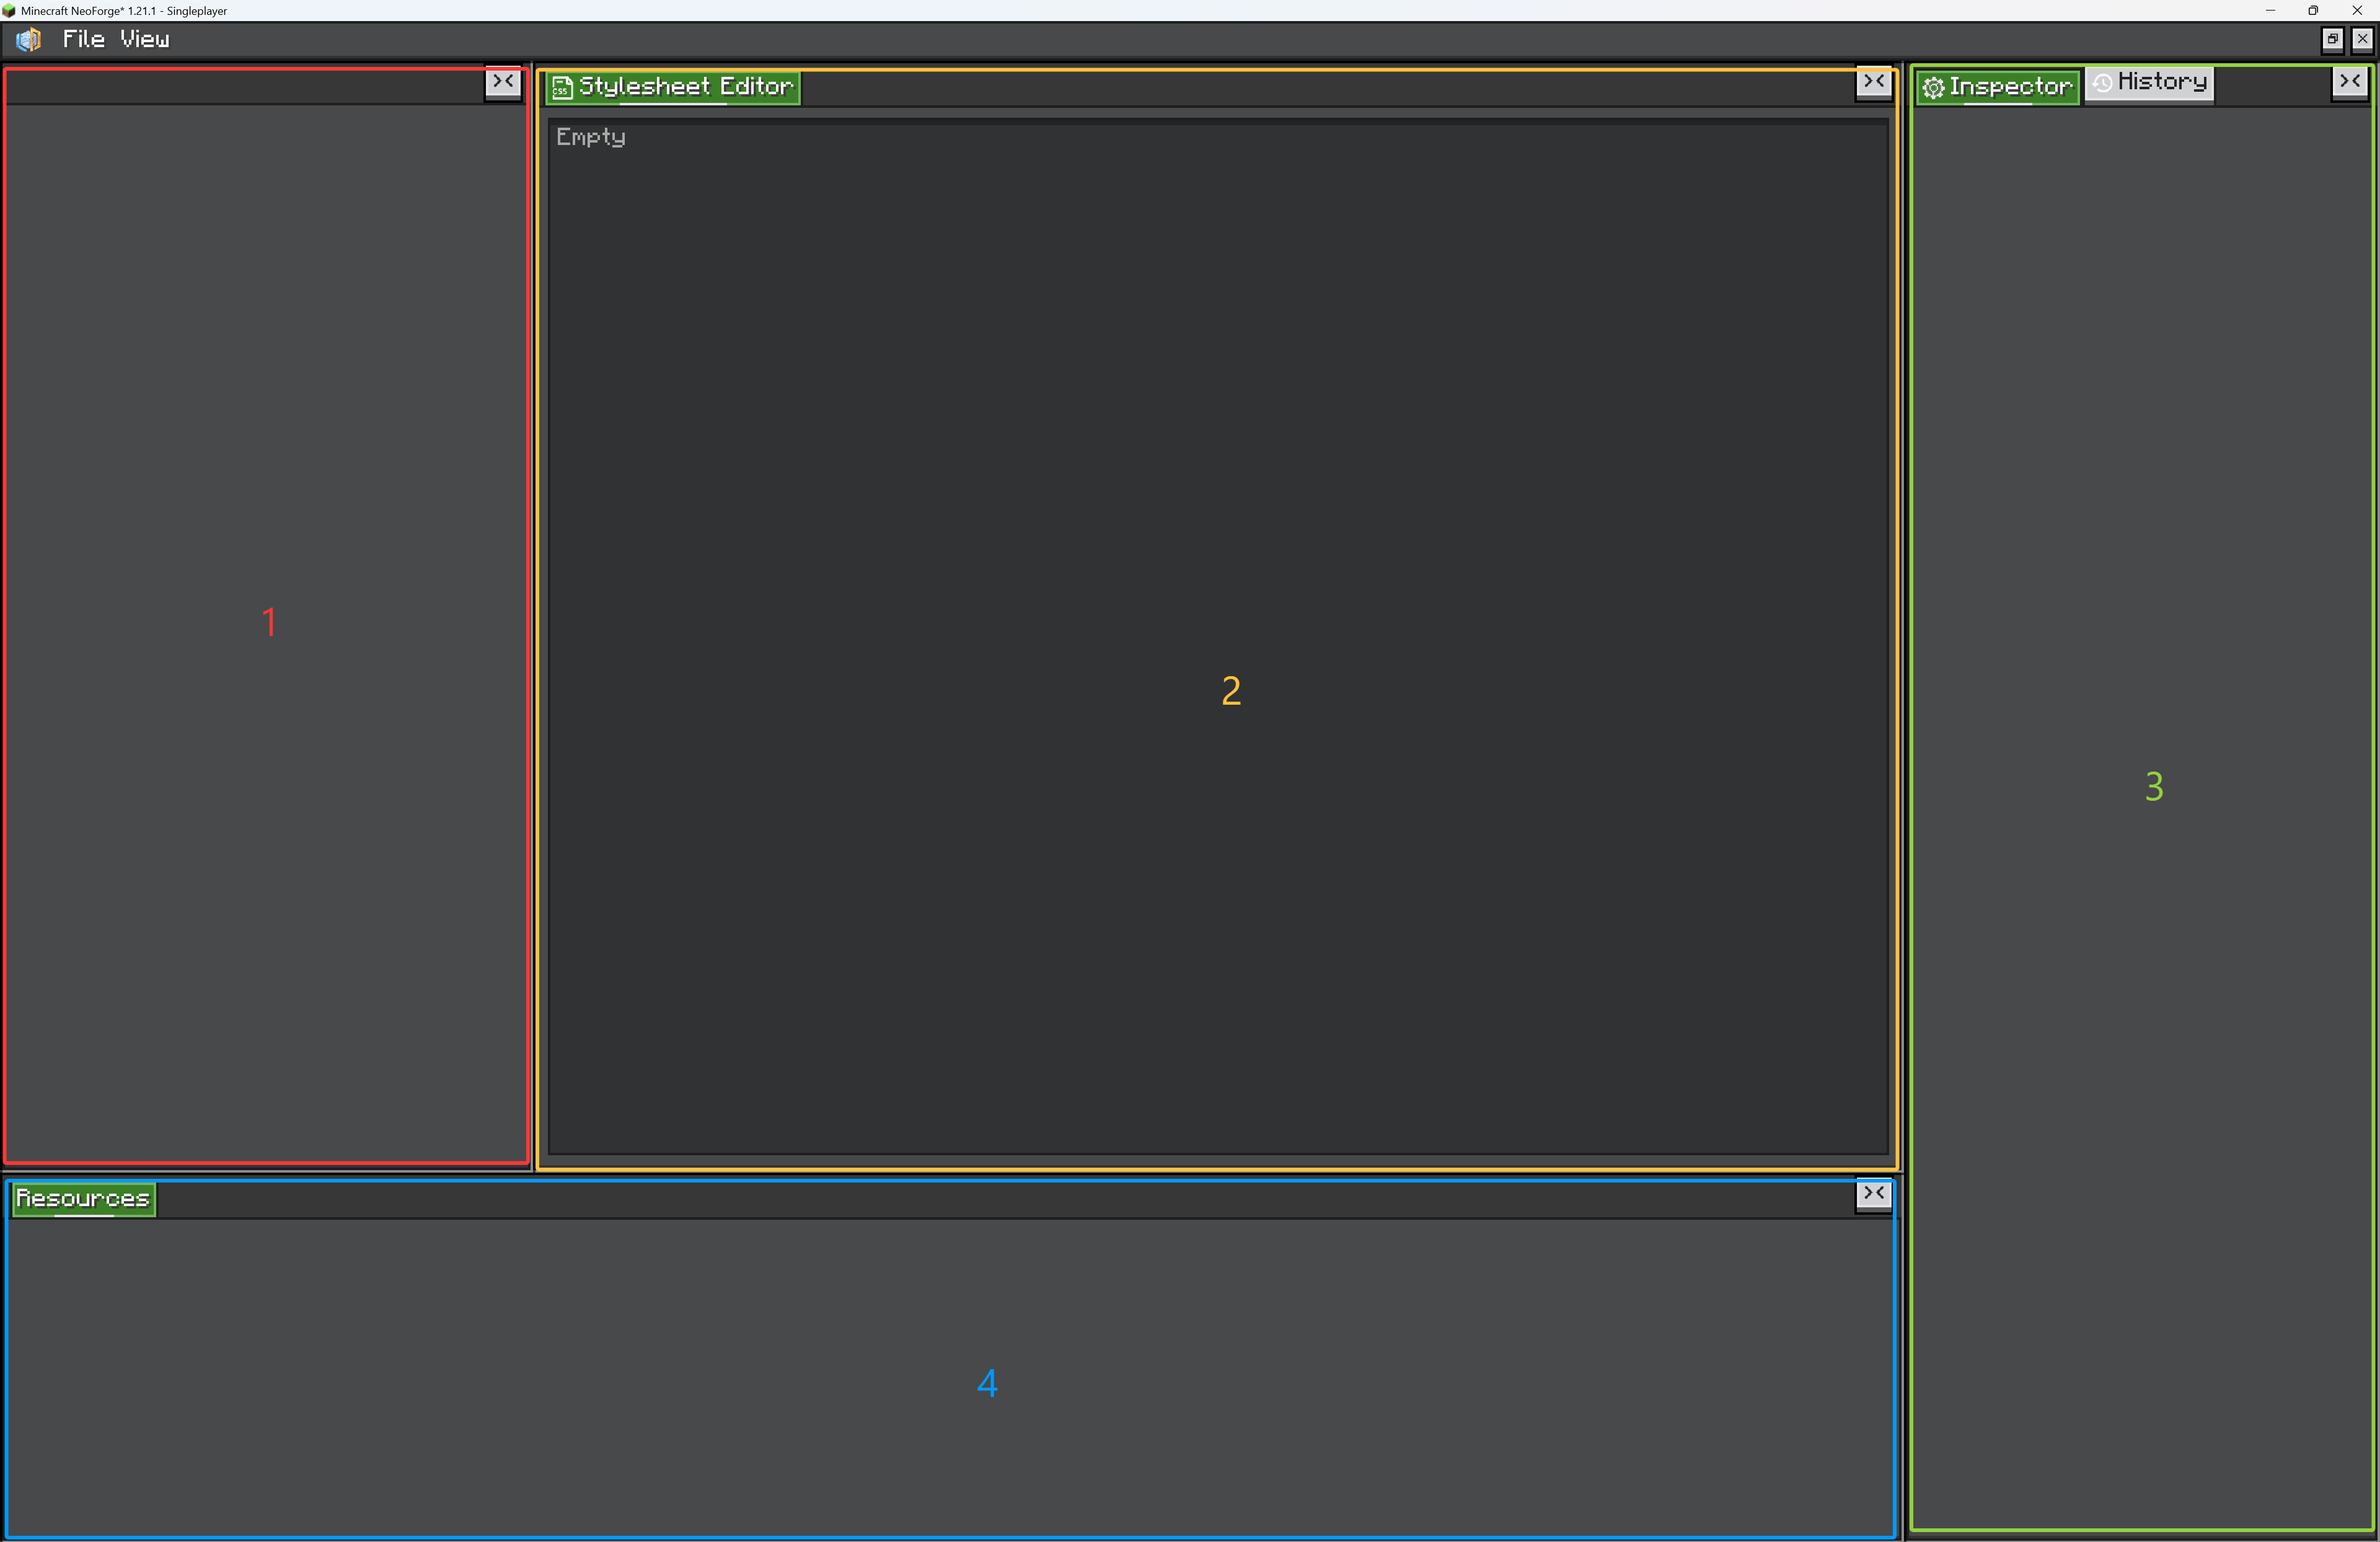
Default View Areas
The editor workspace is split into several default areas. These areas are backed by ViewContainers, which are tabbed containers used to display Views.
-
leftWindow
A left-side area for hierarchy, tree, list, or browser-style views. -
centerWindow
The main work area. Put your primary editor view here: canvas, graph, code editor, preview, or scene view. -
rightWindow
A right-side area for inspector-like panels. The built-inInspectorViewandHistoryVieware placed here by default. -
bottomWindow
A bottom area for asset/resource views. The built-inResourceViewis placed here by default.
Use placeView(view, fallback) to put a view into one of these areas:
The fallback chooses the default ViewContainer. Users can still drag views between panels at runtime.
Create the Editor
Create an Editor subclass for your tool. The editor owns the workspace, menus, built-in views, settings, and the currently loaded project.
public class ShopEditor extends Editor {
    public static final ResourceLocation WINDOW_ID = LDLib2.id("shop_editor");

    public ShopEditor() {
        var view = new View("editor.view.shop");
        view.addChild(new Label().setText("Shop Editor"));
        placeView(view, () -> centerWindow.getLeftTop());
    }

    @Override
    protected Editor createNewEditorInstance() {
        return new ShopEditor();
    }

    @Override
    protected void initMenus() {
        super.initMenus();
        fileMenu.addProjectProvider(ShopProject.TYPE);
    }
}
EditorWindow is the shell that hosts the editor. It handles editor tabs, maximized/windowed mode, minimize restore, dragging, resizing, and GUI scale restore.
Use a fixed WINDOW_ID when the same editor should be restored after being minimized:
Use a direct window when you only need a temporary client screen:
Create a Project Type
A project type tells the File menu how to create, open, save, and identify your project files.
public class ShopProject implements IProject {
    public static final ProjectType TYPE = ProjectType.of(
            Icons.FILE,
            "project.shop",
            ".shop.nbt",
            ShopProject::new
    );

    private final Resources resources = Resources.of(
            ShopEntryResource.INSTANCE
    );

    @Override
    public Resources getResources() {
        return resources;
    }

    @Override
    public ProjectType getProjectType() {
        return TYPE;
    }

    @Override
    public void initNewProject() {
        // Fill default project data here.
    }

    @Override
    public void onLoad(Editor editor) {
        // Add project-specific views here.
    }

    @Override
    public void onClosed(Editor editor) {
        // Remove project-specific views here.
    }

    @Override
    public CompoundTag serializeProject(HolderLookup.Provider provider) {
        return new CompoundTag();
    }

    @Override
    public void deserializeProject(HolderLookup.Provider provider, CompoundTag nbt) {
        // Restore project data here.
    }
}
When the project is loaded, Editor reads project.getResources() and loads those resources into the built-in resource view.
Open as a Client Screen
For a pure client-only tool or a test screen, create a ModularUI directly from an EditorWindow:
public ModularUI createUI(Player player) {
    var root = new EditorWindow(ShopEditor::new);
    return new ModularUI(UI.of(root))
            .shouldCloseOnEsc(false)
            .shouldCloseOnKeyInventory(false);
}
This is simple and useful for local editor tools that do not need container-menu behavior.
Open Through a Menu
For a real player-opened editor, register a PlayerUIMenuType and open it from the server side.
PlayerUIMenuType.register(ShopEditor.WINDOW_ID, ignored -> player -> {
    if (player.level().isClientSide) {
        return new ModularUI(UI.of(EditorWindow.open(ShopEditor.WINDOW_ID, ShopEditor::new)))
                .shouldCloseOnEsc(false)
                .shouldCloseOnKeyInventory(false);
    }
    return new ModularUI(UI.empty());
});
Open it later:
XEI drag-and-drop
If your editor should support XEI drag setting features, open it through a menu. A plain client-only screen is fine for quick tools, but menu-backed opening gives the editor the container context needed by those integrations.